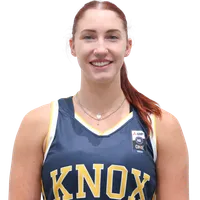
Taylah Simmons
Shot chart
Shooting by distance
| Range | FGM | FGA | FG% |
|---|
| 0-5ft | 211 | 363 | 58.1% |
| 5-10ft | 144 | 272 | 52.9% |
| 10-15ft | 41 | 116 | 35.3% |
| 15-20ft | 23 | 62 | 37.1% |
| 20-25ft | 54 | 197 | 27.4% |
| 25-30ft | 17 | 65 | 26.2% |
| 30-35ft | 0 | 2 | 0% |
| 35-40ft | 0 | 1 | 0% |
Shooting by zone
| Zone | FGM | FGA | FG% |
|---|
| Threes |
|---|
| Left Corner 3 | 13 | 23 | 56.5% |
| Left Wing 3 | 17 | 63 | 27% |
| Right Corner 3 | 5 | 21 | 23.8% |
| Right Wing 3 | 14 | 75 | 18.7% |
| Straight 3 | 21 | 76 | 27.6% |
| Twos |
|---|
| Key | 187 | 366 | 51.1% |
| Left Wing 2 | 10 | 47 | 21.3% |
| Restricted Circle | 187 | 310 | 60.3% |
| Right Wing 2 | 30 | 71 | 42.3% |
| Straight 2 | 6 | 26 | 23.1% |
Glossary
- GP Games played
- GS Games started
- POS Position
- MIN Minutes
- PTS Points
- FGM Field Goals Made
- FGA Field Goals Attempted
- FG% Field Goal Percentage
- 2PM Two-point Field Goals Made
- 2PA Two-point Field Goals Attemped
- 2P% Two-point Field Goal Percentage
- 3PM Three-point Field Goals Made
- 3PA Three-point Field Goals Attempted
- 3P% Three-point Field Goal Percentage
- FTM Free Throws Made
- FTA Free Throws Attempted
- FT% Free Throw Percentage
- OREB Offensive Rebounds
- DREB Defensive Rebounds
- REB Rebounds
- AST Assists
- TOV Turnovers
- STL Steals
- BLK Blocks
- PF Personal Fouls
- +/- Plus/Minus
- DD2 Double-double
- TD3 Triple-double
- EFF Efficiency
- GmSc Game Score
- AURA AURA Rating
